 BillsOn
Your bills.
On your iPhone screen.
Choose the appearance in BillsOn, then add the widget to your Home Screen.
Choose how your widget looks
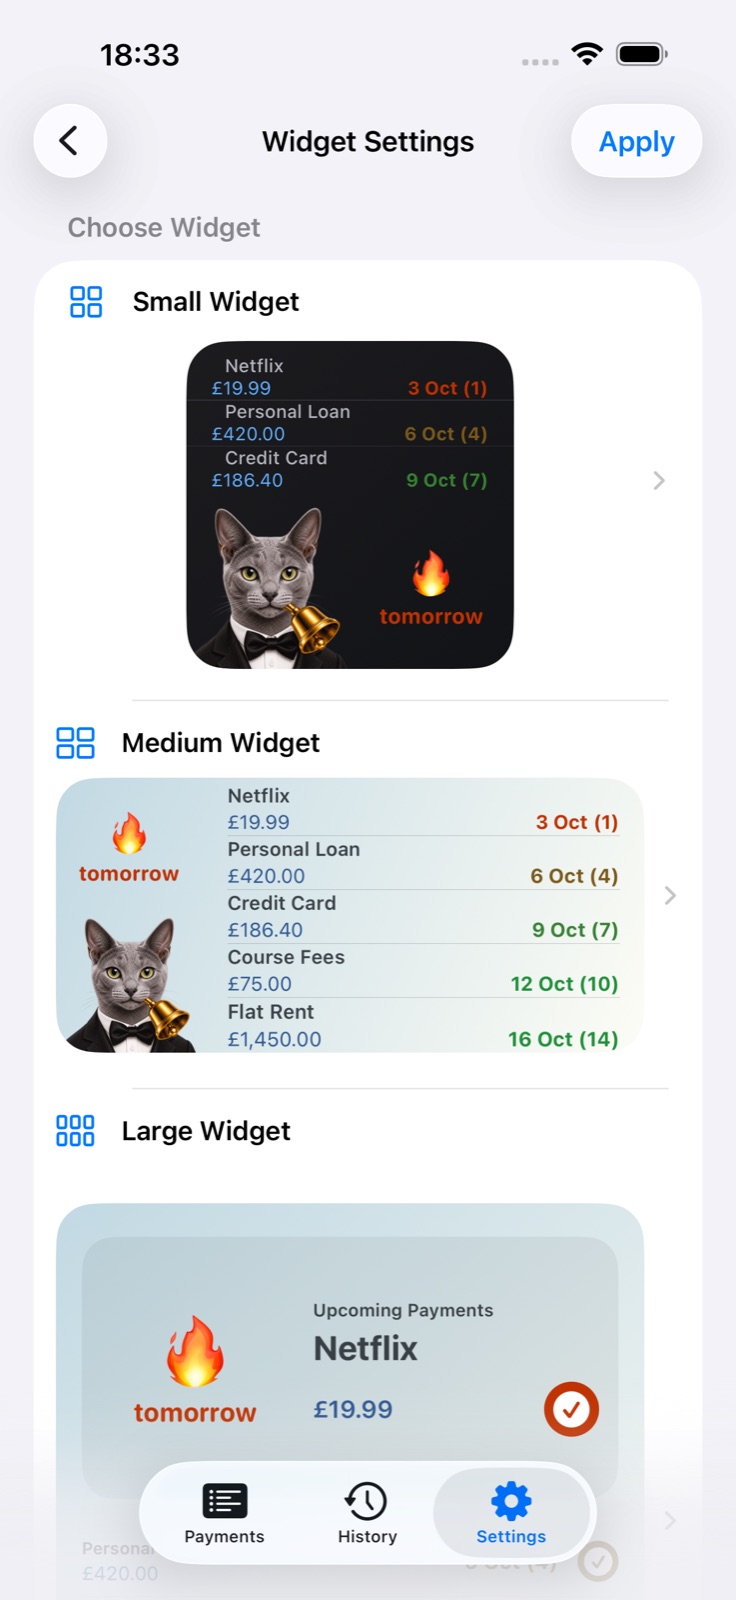
Open Widget Settings
In BillsOn, open Settings, find Widget and open Widget Settings.
Choose a size and layout
Select small, medium or large. Small and medium offer ready-made layouts and manual customisation.
Save the appearance
If the layout includes an image, choose it before the colours. Tap Apply, or Save in manual settings.
What can I customize?
Ready-made option
A layout combining an image, payment list and date. It determines the wizard’s next steps.
Image
Small and medium: app icon, custom image, emoji or no image. In manual preview, image and date blocks can be moved.
Photo
Choose from Photos and crop it. Small and medium image settings are separate.
Theme and palette
Light/dark appearance, palettes and custom background, amount and information colours. You can create a palette.
Text size and rows
Label size and number of payments displayed. Large widgets also offer text size and row controls.
Amount, currency, decimal places
Small and medium widgets can show or hide these separately.
Date
Textual date format for small and medium widgets. Options differ by size.
Save / Apply
Sends settings to the widget without adding it to your Home Screen. Another save is disabled for 5 seconds.
Add it to your Home Screen
Go to the Home Screen
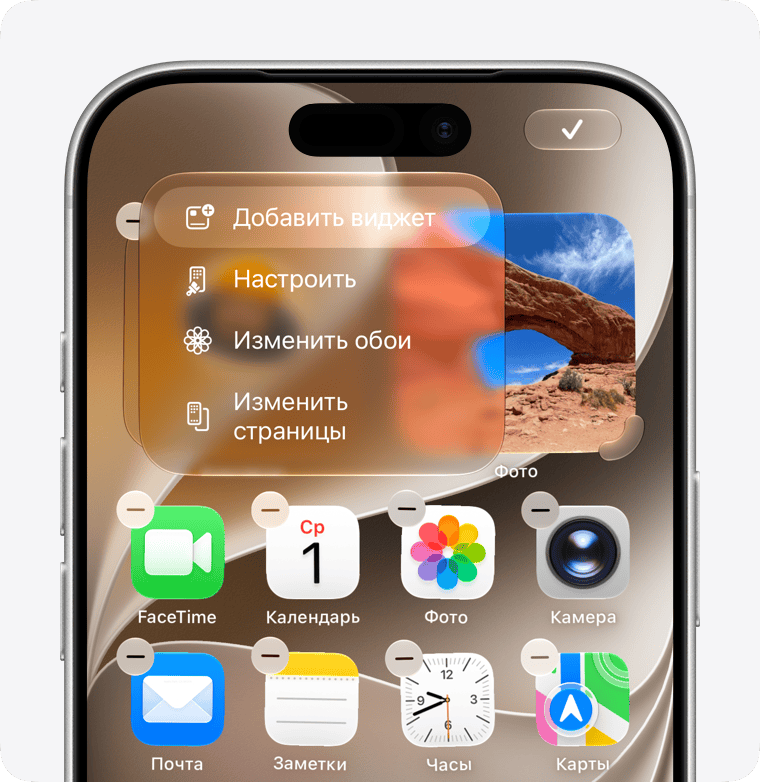
Hold an empty area until the app icons start to jiggle.
Open the widget gallery
Choose Edit → Add Widget. Older iOS versions use +.
Find BillsOn
Select the app; if its old name is shown, look for Payment Reminder.
Add the matching size
Choose the size you configured in BillsOn, add it and finish editing.
The widget looks different
Small and medium widgets support a system Configuration parameter. If Edit Widget shows it, use Configuration 1 for the appearance saved by the current BillsOn wizard. Match the installed widget size to the size you configured. The large widget has separate appearance settings.
See a bill before unlocking
Personalise the screen
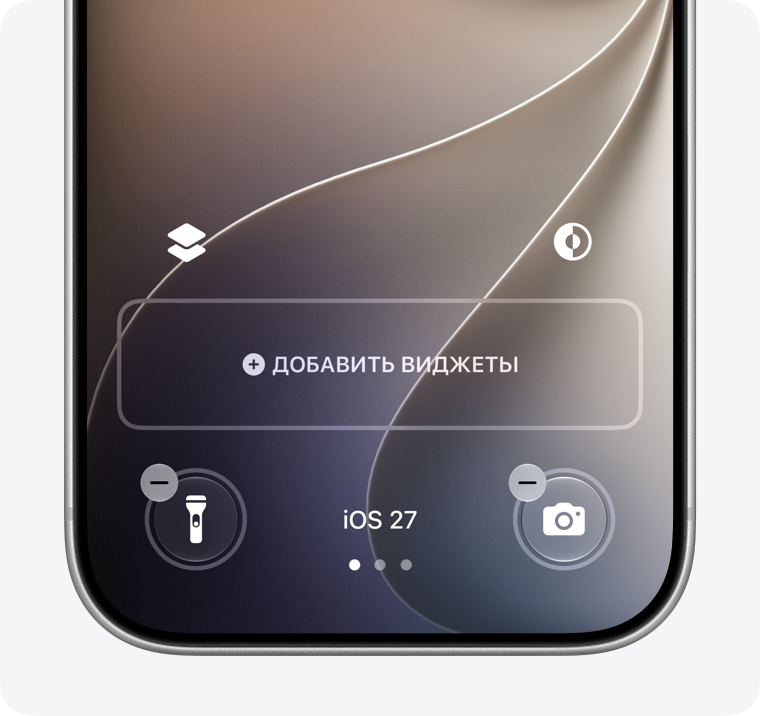
Hold the Lock Screen and open customization.
Open the widget area
Select Add Widgets and find BillsOn / Payment Reminder.
Add and save
Choose a nearest-payment widget and save the Lock Screen.
Emojis, stickers and your own layout
Change status emojis
On the main Widget Settings screen, find Emojis in Widget. Set icons for overdue bills, bills due today and bills due tomorrow, then tap Apply. These indicate the due status; the widget image is chosen separately.
Add a sticker
In small or medium widget image settings, choose the emoji option. On iOS 18 or later, use Pick Sticker from Emoji Keyboard: tap the field, open the emoji keyboard and choose a sticker. To remove it, tap the cross beside its preview and confirm. Save the appearance.
Create a colour scheme
Open the palette picker and use the add control. Choose light or dark, enter a name and set the top and bottom background colours, amount colour and information colour. Tap Add, select the scheme and finish saving the appearance. Light and dark schemes are configured separately.
Edit a scheme
Use the edit control for a palette. Change its name or colours and save. Check the preview to ensure amounts and labels remain readable against the background.
Move the blocks
Open manual settings for a small or medium widget. Drag its image or date block within the preview. Block size changes the space it occupies; row count and text size have separate controls. A layout without an image has no image block. Tap Save.
Check these settings
Changes do not appear
Return to BillsOn and tap Apply or Save. Check the installed size. iOS controls refresh timing, so an update can take time.
A bill is missing
Check that it is active. Paused, archived and subscription-disabled bills are excluded. Also check the row count.
BillsOn is not listed
Open the installed app and check the gallery again.
Save is disabled
There is a 5-second pause after saving. On the main Widget Settings screen, Apply can also be disabled when nothing changed.
System screenshots and iOS help — Apple ↗
Next guideAdd and personalise a bill →