 BillsOn
Set up the app
Reminders, synchronization, security and subscriptions, with an explanation of what each setting changes.
Global reminders and repeated alerts
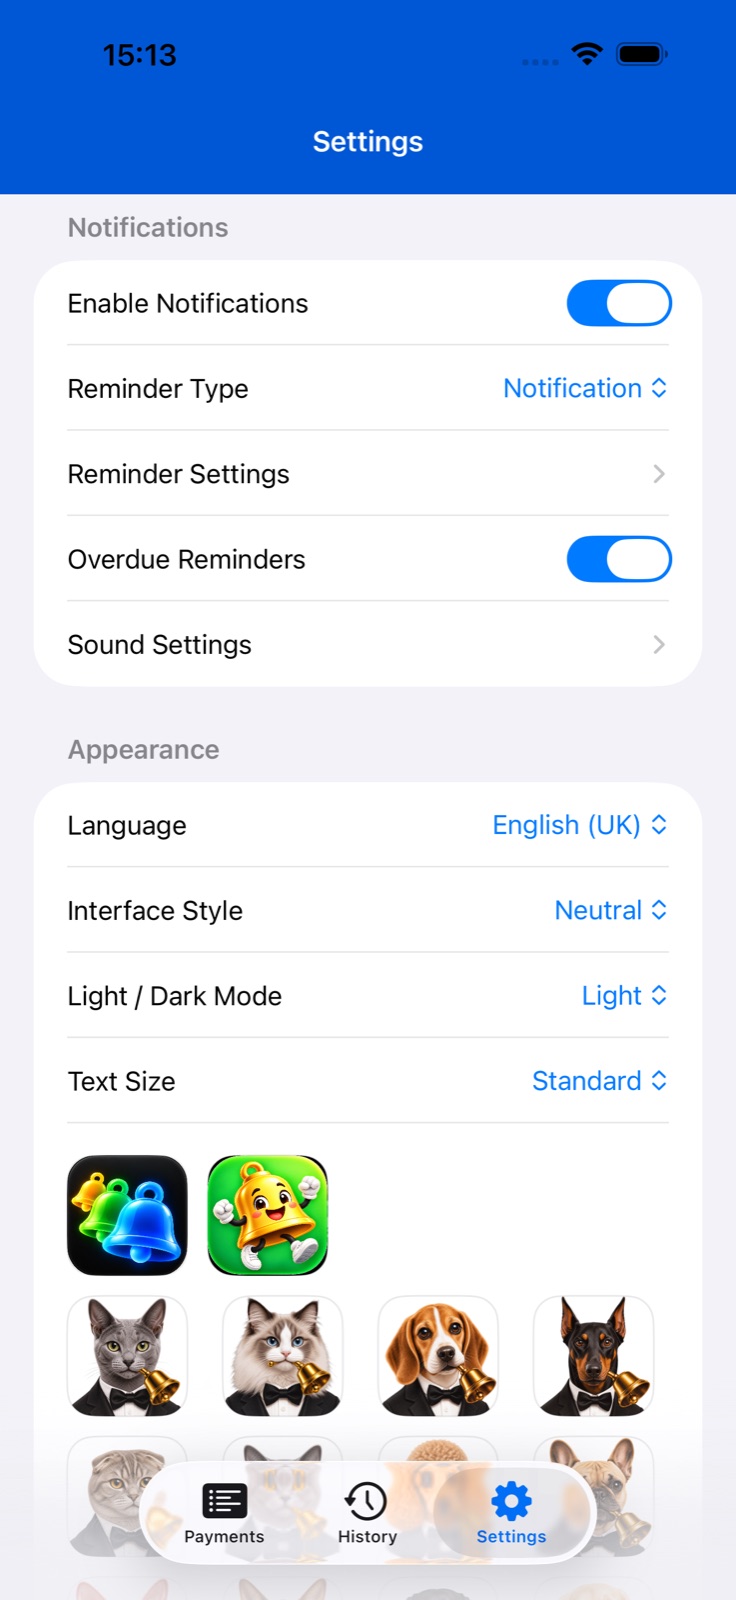
Open Settings → notifications. The main switch enables app reminders. Allow notifications when iOS asks.
Choose the presentation: a notification or an alarm, when available on your device. Alarms request separate permission. The two types have separate sounds.
Open reminder offsets to set lead days, time and text. The same screen offers frequent reminders: lead days, interval in hours and start/end times. Due-day reminders have their own type, interval and time window.
Under notification actions, choose a snooze interval: 15 or 30 minutes, or 1, 2 or 4 hours. The current screen has no separate snooze switch or end-time control. Snooze the alert using its notification action.
For a particular bill, create or edit sound and reminder profiles using the controls next to their pickers. Custom Reminder under Advanced overrides the profile’s days and time. The main guide explains precedence and sound import.
Vibration, frequent alerts and overdue bills
In Settings, open Sound Settings. Below notification and alarm sounds is the vibration switch. It saves the app vibration preference; iPhone system modes can also affect alerts.
Enable frequent alerts in reminder-offset settings. Choose a lead time of 1, 2, 3, 5, 7 or 14 days. Due day only disables the controls for alerts before the due date; use the separate due-day controls instead.
Repeated alerts offer intervals of 1, 2, 3, 4, 6, 8 or 12 hours. Set start and end times. For example, a 3-hour interval and 09:00–18:00 window keep reminders within daytime hours. Lead days and the due day have separate settings.
Enable overdue reminders in the main notifications section. When the app schedules alerts for an already overdue bill, it adds one extra reminder for 2 hours later. This is not a continuous 2-hour repeat: rescheduling replaces the pending alert.
No extra overdue reminder is created for paused, archived or subscription-disabled bills. Alert delivery also depends on notification permissions and system settings.
Create a reminder profile
Open Add or Edit Payment and the Sounds section. Use + next to a profile picker to create a profile, or its edit control to change the selected one.
For a sound profile, enter a short name and choose notification and alarm sounds separately. Save it and select it for the intended bill.
A reminder-profile name is limited to 12 characters. Choose the alert type, lead days and time. Repeat controls alerts on the due day: no repeat, or every 1, 2, 3 or 4 hours. Snooze offers 5, 10, 15, 30 or 60 minutes.
Tap Add or Save, then check the selected profile in the bill form. When Custom Reminder is enabled, its days and time take precedence over the profile.
Enable iCloud and check synchronization
Enable iCloud synchronization in Settings. The app displays a restart note after enabling it; close and reopen the app.
Use the intended iCloud account on your devices and allow the app access to iCloud. If changes are missing, check the internet connection and open the app on both devices.
Synchronization depends on iCloud and may not display every change immediately. Avoid creating a duplicate just because the other device has not updated yet.
Language, appearance and access protection
Under Appearance, choose an app language or the system language, theme, light/dark mode and text size. These affect the app interface; widgets have separate appearance settings.
Tap an icon under App Icon. Alternate-icon availability depends on the device and icons included in the installed version.
In Security, enable App Lock to protect access using device authentication. A separate switch controls the app-icon badge, whose count includes active bills due today or earlier.
Under animation settings, enable or disable the pet and choose its type. In Help, you can restart the in-app walkthrough.
Pay Without Confirmation in global settings speeds up recording a full payment. Use the confirmation form when you need to review the amount, date or record a partial payment.
Subscription and active-payment limits
Open Subscription in Settings to see your current plan and active-payment usage. View Plans shows available offers and their current terms.
If a purchase is missing, tap Restore Purchases. A paid plan also has Manage Subscription, which opens Apple’s system subscription screen.
At the limit, adding, duplicating or reactivating a bill may open the subscription screen. Bills disabled by the limit are excluded from widgets and the active schedule.
If offered an active-payment swap, choose which current bill to disable and confirm. You make the choice; upgrading is also available.